> ## Documentation Index
> Fetch the complete documentation index at: https://docs.switchagents.ai/llms.txt
> Use this file to discover all available pages before exploring further.
> ## Agent Instructions
> These docs moved from docs.flintai.dev to docs.switchagents.ai. Use docs.switchagents.ai for every link and request.
> To search these docs from an AI tool, connect the MCP server at https://docs.switchagents.ai/mcp. The page index is at https://docs.switchagents.ai/llms.txt.
# Scan your agent
> Prove your agents are production ready in less than 10 minutes
Find misconfigurations, risky tool access, missing guardrails, and other issues in your Python agent code. An LLM does the analysis and triages false positives, so you see real problems, not noise.
Source code, example agents, and issue tracking
Install our MCP server in Claude Code or your AI code assistant, then ask: **"Help me set up Flint AI Scan"** to get live guidance, troubleshoot issues, and work through these steps together. [Learn how →](/switch-trust-cli/resources/use-these-docs)
## Scan your Python agent code
Check that Flint AI CLI and OpenGrep are installed:
```bash theme={null}
flintai --version
opengrep --version
```
```bash theme={null}
# Linux / macOS
curl -fsSL https://raw.githubusercontent.com/opengrep/opengrep/main/install.sh | bash
# Windows PowerShell
irm https://raw.githubusercontent.com/opengrep/opengrep/main/install.ps1 | iex
```
See [OpenGrep installation](https://github.com/opengrep/opengrep#installation) for more options.
Using a virtual environment is recommended to avoid dependency conflicts:
```bash theme={null}
python3 -m venv .venv
source .venv/bin/activate
```
Install Flint AI CLI:
```bash theme={null}
pip install flintai-cli
flintai init
```
[Full installation guide →](/switch-trust-cli#try-it-now)
**Bring your own LLM key.** Flint AI Scan uses AI reasoning to validate findings, so it needs an API key for your own LLM provider (Gemini, OpenAI, Anthropic, or LiteLLM). This is your provider key for the local CLI, not a Flint AI Platform API token. `flintai init` prompts for it and stores it locally in `~/.flintai/.env`.
* **Google Gemini**: [aistudio.google.com/apikey](https://aistudio.google.com/apikey) (free tier available)
* **OpenAI**: [platform.openai.com/api-keys](https://platform.openai.com/api-keys)
* **Anthropic**: [console.anthropic.com/settings/keys](https://console.anthropic.com/settings/keys)
Point to your agent directory and launch the scan:
```bash theme={null}
flintai scan /path/to/your_agent
```
No agent of your own yet? Clone [flintai-cli](https://github.com/sandbox-quantum/flintai-cli) and scan a bundled example from the repo root:
```bash theme={null}
flintai scan examples/bookstore_agent/
```
The repo ships two examples: `bookstore_agent` (OpenAI Agents SDK) and `weather_agent` (Google ADK).
Flint AI Scan only analyzes Python files with supported framework imports. [See supported frameworks →](/switch-trust-cli/resources/faq#supported-frameworks)
Results are saved to `scan_.json`, or `scan_.sarif` if you pass `--format sarif`. See [Scan results](/switch-trust-cli/scan/scan-results) for details on understanding findings and severity scores.
**Integrate with CI/CD.** Save scan results as build artifacts to prove validation before deployment. [See CI/CD integration guide →](/switch-trust-cli/guides/ci-cd-integration)
### Clean scan
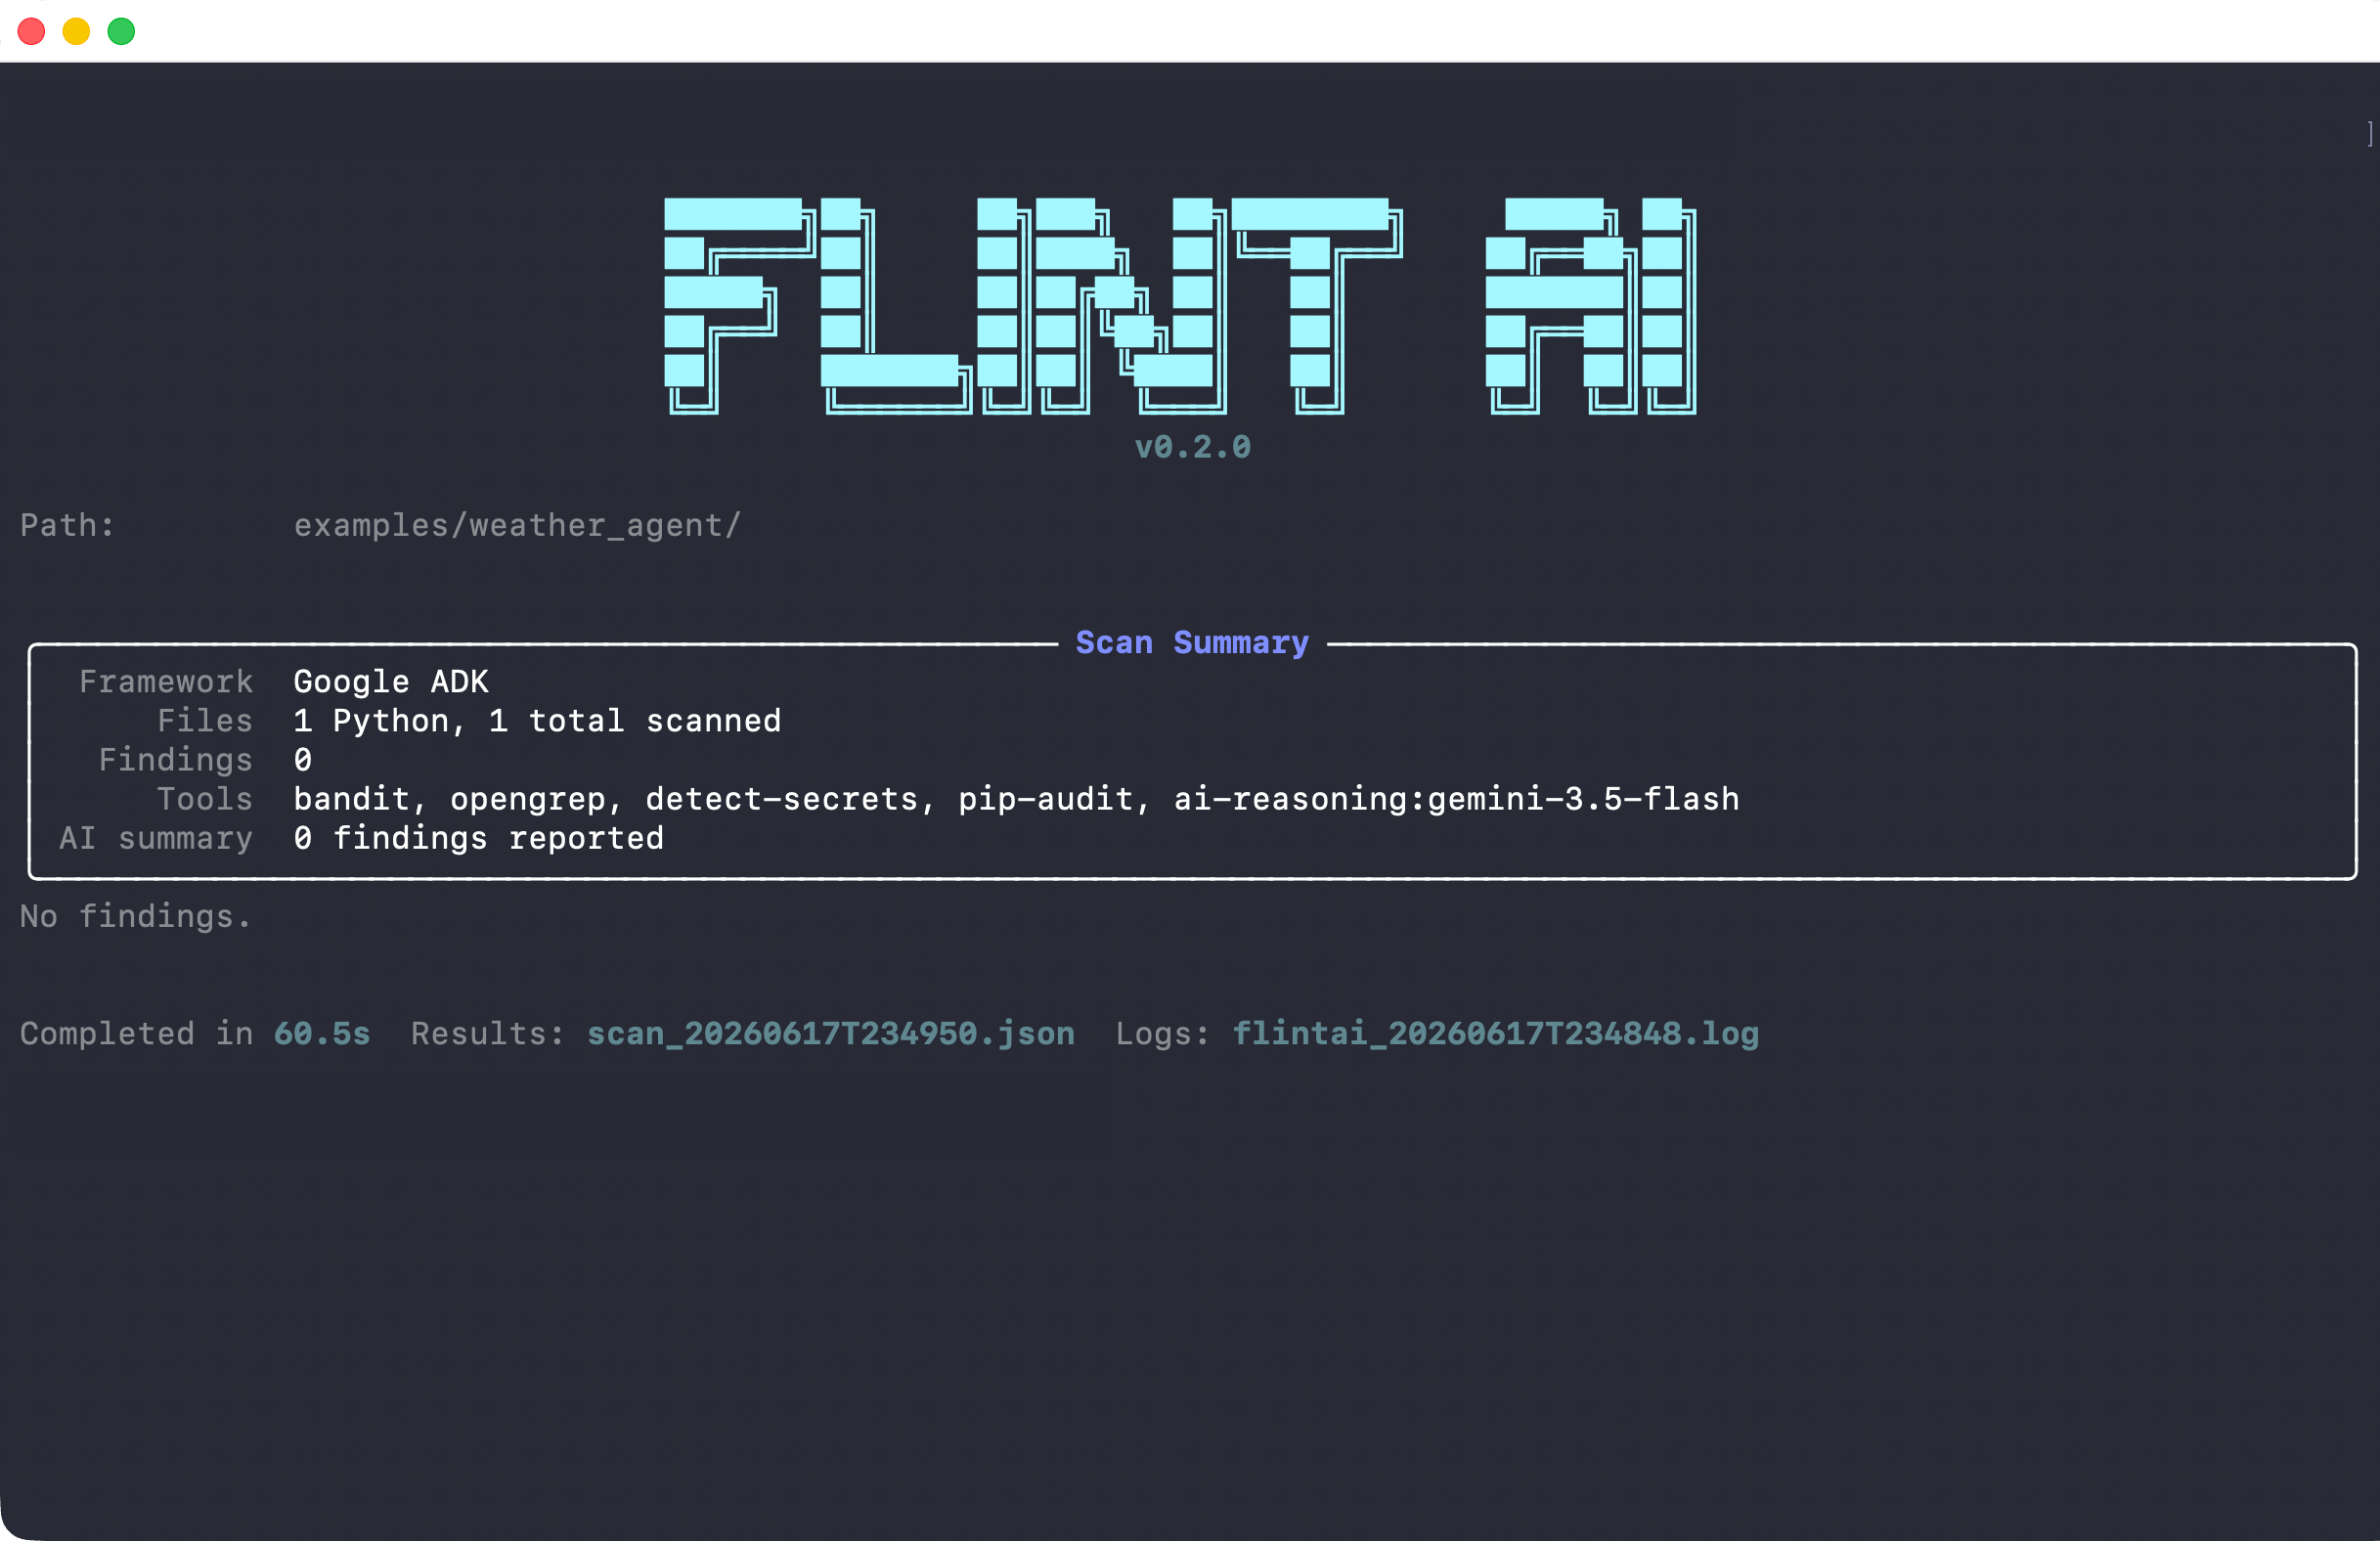 The scan detected an OpenAI Agents SDK agent, analyzed 1 Python file, and found no security issues. Tools ran in sequence: static analyzers (bandit, opengrep, detect-secrets, pip-audit) followed by AI reasoning to validate results.
### Scan with findings
The scan detected an OpenAI Agents SDK agent, analyzed 1 Python file, and found no security issues. Tools ran in sequence: static analyzers (bandit, opengrep, detect-secrets, pip-audit) followed by AI reasoning to validate results.
### Scan with findings
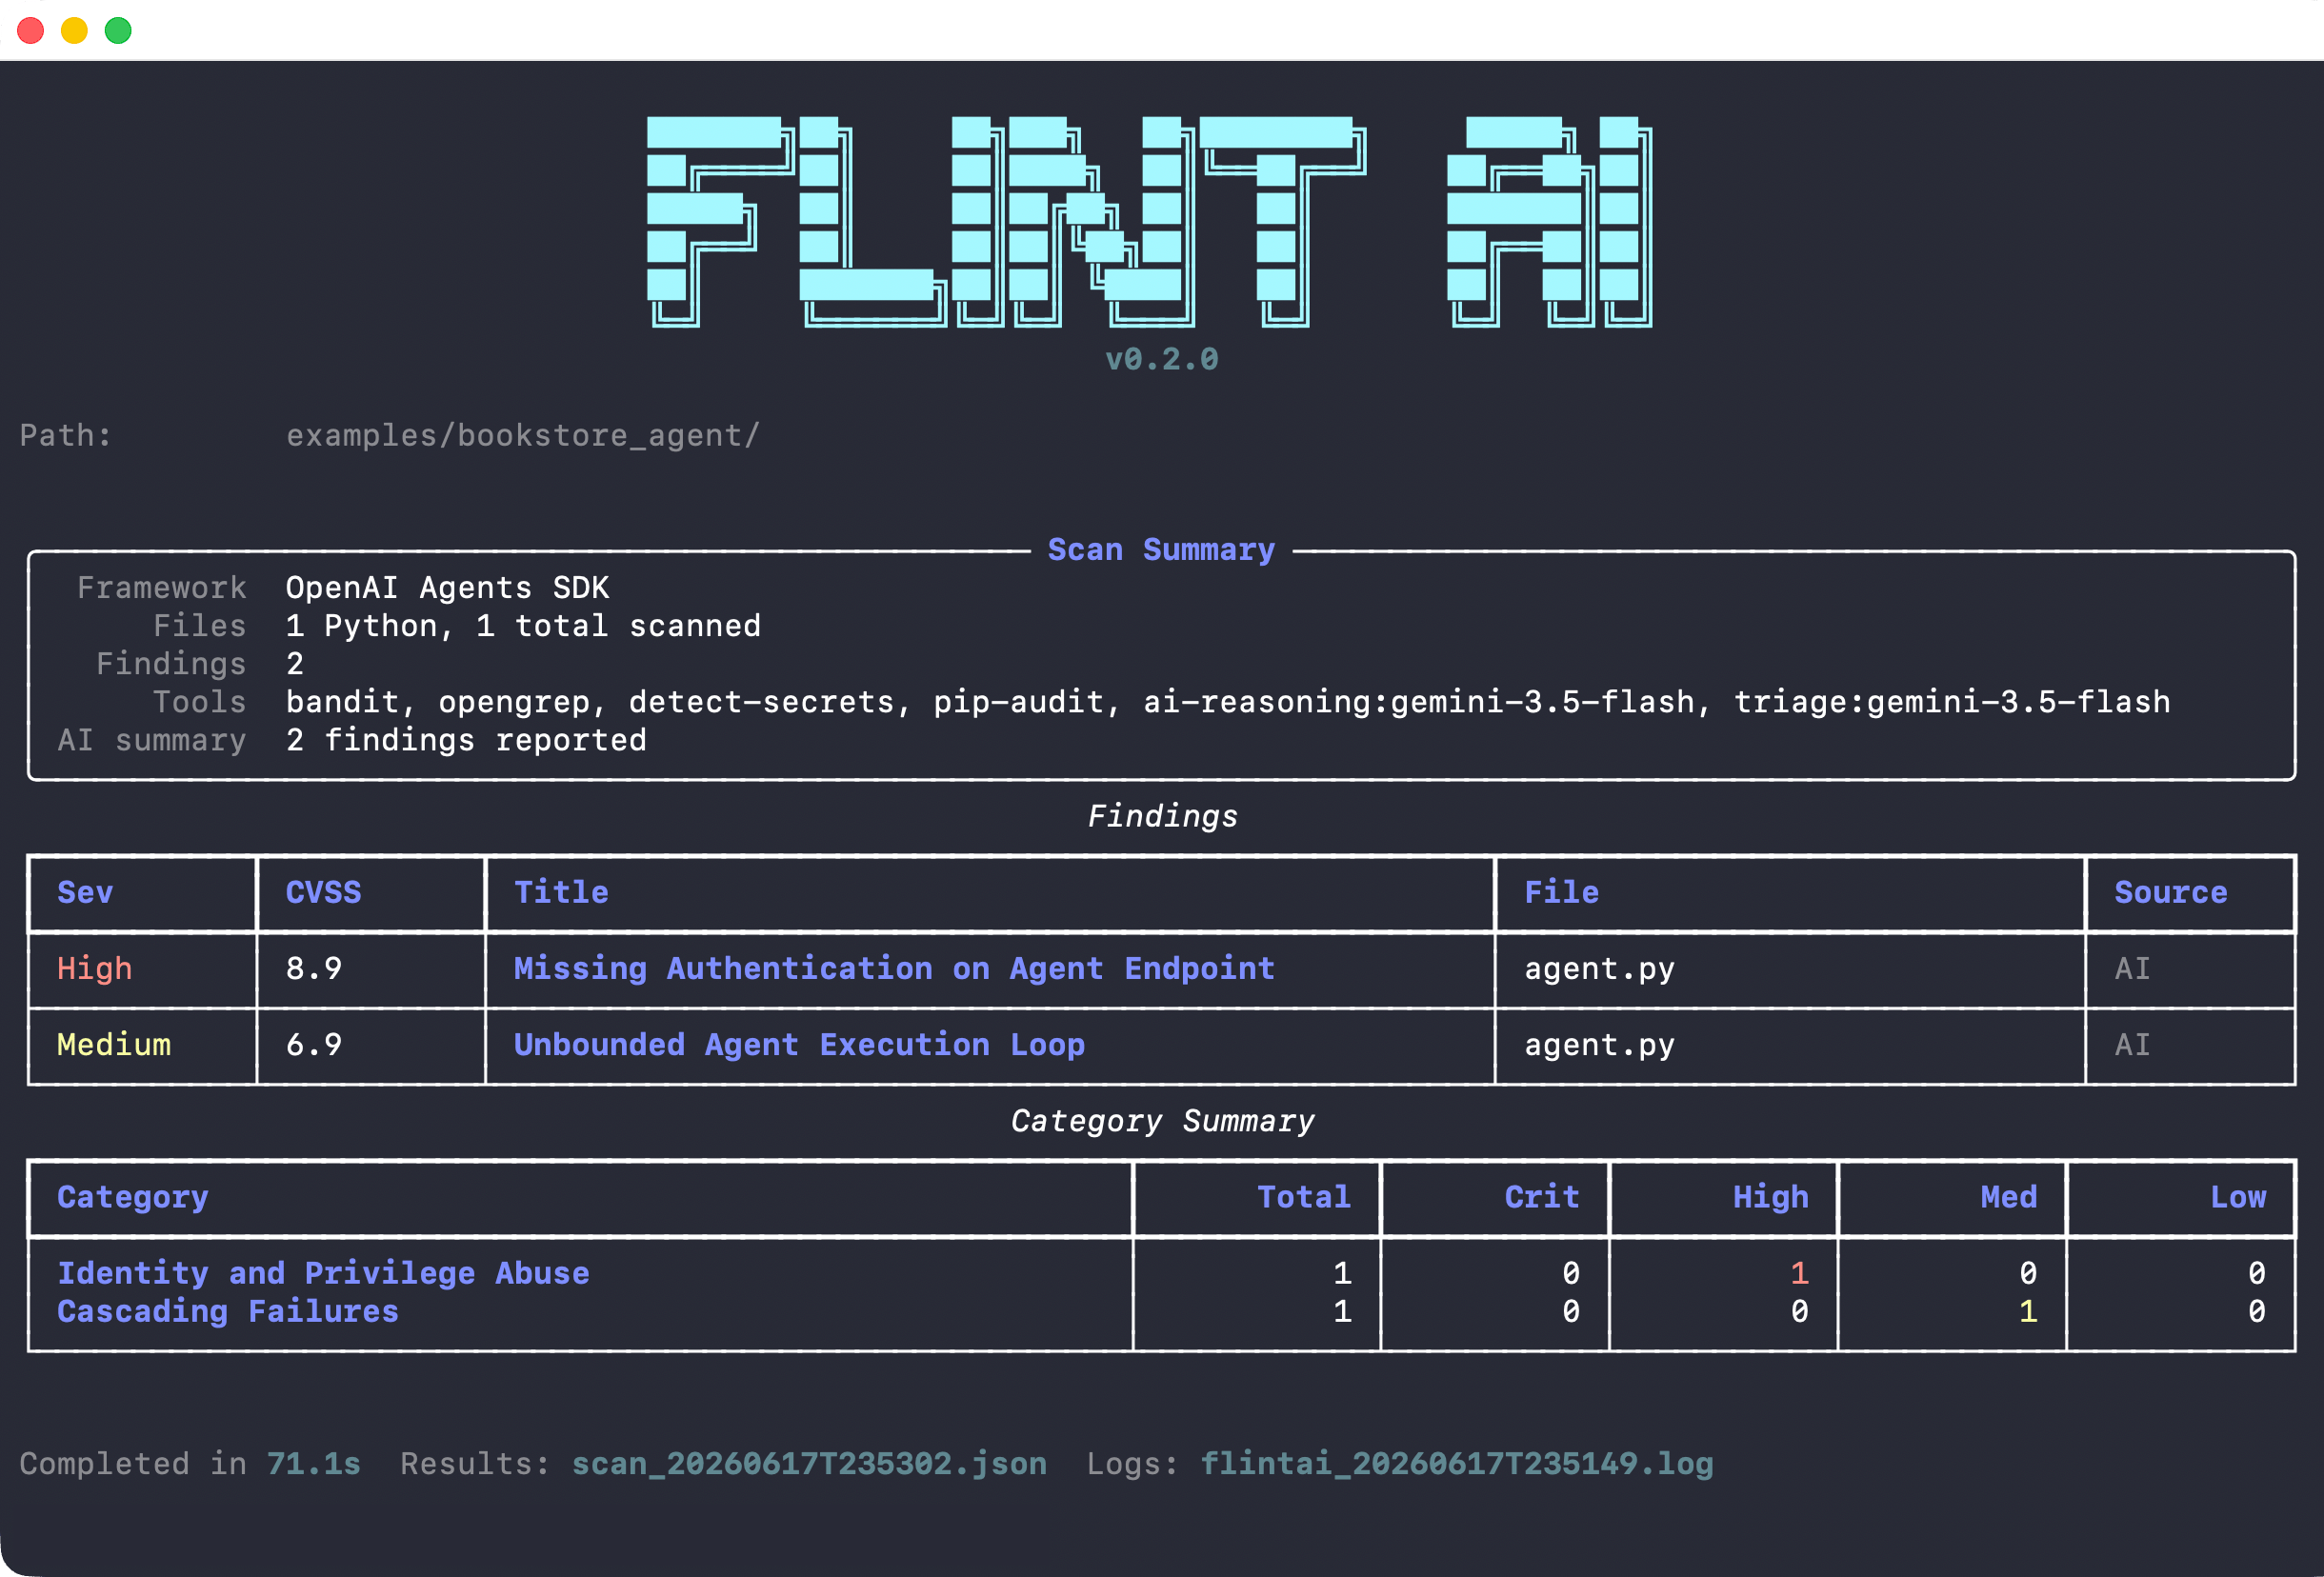 The scan detected an OpenAI Agents SDK agent and found 2 security issues:
* **High severity (CVSS 9.0)**: Missing authentication on agent endpoint
* **Medium severity (CVSS 6.9)**: Unbounded agent execution loop
After static analysis, the AI reasoning layer identified these issues, and triage confirmed them as real findings.
## Next steps
Understand severity scores and what needs fixing before deployment
Learn how AI reasoning finds real issues and filters noise
Get a 0.0-1.0 reliability score for runtime behavior
The scan detected an OpenAI Agents SDK agent and found 2 security issues:
* **High severity (CVSS 9.0)**: Missing authentication on agent endpoint
* **Medium severity (CVSS 6.9)**: Unbounded agent execution loop
After static analysis, the AI reasoning layer identified these issues, and triage confirmed them as real findings.
## Next steps
Understand severity scores and what needs fixing before deployment
Learn how AI reasoning finds real issues and filters noise
Get a 0.0-1.0 reliability score for runtime behavior